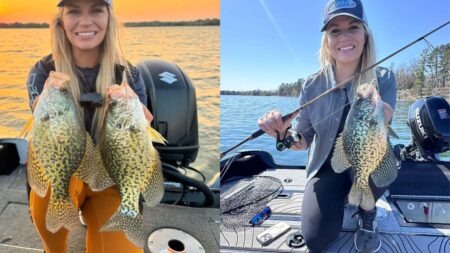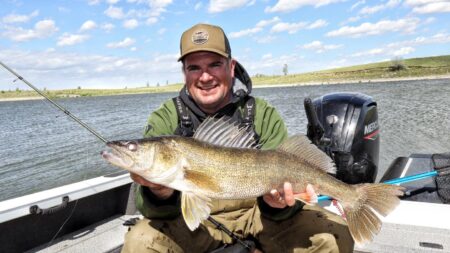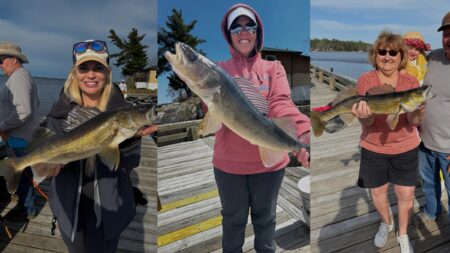
Ice fishing massive perch on Lake Cascade (Cascade Reservoir) was one of the best ice fishing trips I’ve ever had, so much so, I’ve returned numerous times – even in the summer! After the high demand of questions I experienced over the years, I decided I would do a full write up on how to plan your own trip to Cascade, no matter how far away you live.
This Virtual Angling destination guide focuses heavily on planning your trip as an “out-of-stater” – including covering topics on when to go, what to bring, how to travel, and more for going the DIY route. Spoiler alert… you definitely don’t have to drive it to find success.
Below I breakdown exactly what I did, and what you can do, to make Cascade a relatively affordable and easy trip to experience.
Travel Timing – When Should You Go?

My first trip I went to Cascade with two of my good girl friends Ana and Erin. We chose to go during the middle of January. The second trip we went at the end of February. Going again, pending ice conditions, I would always choose January. The fish are less pressured during this time, the fishing is better, and there is much less traffic on the lake. Despite what you hear, the fish are STILL big, even if they aren’t quite as big as they are in early March.
This is earlier than when most anglers prefer to go. It seems that most would prefer to plan their trips towards the middle and end of February, particularly as it gets closer to the spawn. Later in the ice season, perch tend to get bigger (well heavier) and that weight can make a big difference in appearance (and angler ego).
Best of all, we seemed to beat the blood worm hatch which ended up occurring later in February that year (which is rare from my understanding). So the bite played in our favor. Keep in mind however, that this isn’t always the case.
We caught plenty of big fish – (absolute giants). Of course being earlier in the season, the weight wasn’t quite there as it would be going later. However, between less fishing pressure, a better bite (being the specific year), and overall more availability of resources, it was well worth the trade off for our first trip out there.
For travel recommendations, I don’t think you can go wrong from January through February – and even in the beginning of March. Keep in mind though that ice conditions can change rapidly there, so when planning a trip for March keep an eye on the ice conditions before embarking.
Travel and Flight Logistics

If you don’t plan on fishing with a guide, you can rent everything from Lake Cascade Ice Fishing Rentals (or contact them through Tackle Toms the main outdoor shop/bait shop in the actual town of Cascade). This makes flying a great option for the DIY anglers who don’t want to spend the time, gas money, or wear and tear to drive their gear across the country. Lake Cascade Ice Fishing Rentals will have everything to take care of you.
I took a flight from my regional airport to MSP, then a straight shot into Boise. My round-trip flight last year was roughly $500 before the extra checked bag fees. This was much cheaper than gas would have been when hauling a trailer for me. Not to mention, it saved a ton of time and stress traveling through the mountains and dealing with winter weather on the road.
Flying can definitely be the more affordable option. This is true especially if you can split the remaining expenses with others upon arrival.
I was able to fly with my flasher, rods, lures, ice suit/boots – no problem. That leaves transportation, ice house, and auger left for rental. Honestly, most people could make it without an ice house. The days were nice – far nicer than 90% of my ice fishing in northern Minnesota. The weather, although it can get bad at times, is on average much more tolerable than a big portion of the midwest and southern Canada during that time of year.
I took a late night flight (cheaper) into Boise the night before. The next day we traveled to the lake. We left fairly early in the morning and still had plenty of time to get our gear, license, snowmobile and fish that next day. Fishing in the afternoon was great.
So here is a precise breakdown of instructions if you’re planning a DIY trip.
- Fly into Boise and rent a vehicle that can get you to Cascade. Keep in mind vehicle rentals are pretty cheap. The only recommendation regarding vehicle rental is that you have 4 wheel drive and something with some space for gear. Don’t worry about a trailer if you are planning on renting a sled from Lake Cascade Ice Fishing Rentals, as they will take care of setting you up right at the lake.
- Stay at Alpine RV & Resort or find a local Airbnb if they are full.
- Make sure you have reserved your snowmobile and ice gear BEFORE you get there. If you can’t rent it, you can probably buy it if you are desperate. However, I highly recommend reserving these things well before you take your trip just as you would your lodging accommodations. Things book up quick.
- Stop at the store on your way to your accommodations if you need to pick up rental gear. If you have already reserved your gear, make sure to stop by Tackle Tom’s in Cascade during their business hours to pickup your rental gear from Lake Cascade Ice Fishing Rentals and get a plan made and finalized for your snowmobile drop-off. Of course, they will also answer any questions you may have and make sure you are prepared to operate your equipment. For pricing, you can give Lake Cascade Ice Fishing Rentals a call at (920) 728-2817. This is a new rental business, with quality sleds and gear for traveling anglers to use!
- Make sure you have your Idaho fishing license. We picked up our licenses when we stopped at Tackle Tom’s for bait and to get set with our rental from Lake Cascade Ice Fishing Rentals. However, you can get yours online ahead of time through the Idaho Fish & Game website here.
Although it does take some logistics, flying in and renting is really a simple option that can save a lot of time during these trips.
Accommodations

Next, let’s cover where to stay. There are a couple of resorts near the lake and some additional accommodations in the town of Cascade. A quick search will show you places such as Alpine Resort and RV (stayed during summer) and Tamarack Resort. However, we decided to stay right on the lake and commute to our fishing destinations via the rented snowmobile. Airbnb and VRBO are perfect for finding these types of rental locations. However, reserving them early is going to be KEY.
The place we chose had a trail straight from our cabin to the lake, making the entire process a breeze. If you stay at Alpine, you can work with them and Cascade Ice Rentals to help you with your logistics.
A Note On Guided Lake Cascade Fishing
If you’re looking at planning a short trip and want to get on jumbo perch easily and quickly. I do recommend considering booking a guide. It will obviously cost more than going DIY and renting gear, but will increase your odds of having that highly sought after Lake Cascade experience catching true jumbos – especially if you are limited on time. Chris Weber is an excellent guide to check out on this body of water (he shares some trip planning tips and what to expect here). Keep in mind that if you are planning to fish with a guide, to travel as light as possible. They will have you setup with everything you could need, so in this case, leave the flasher, rods, and lures at home. Learning the lake can take time, and if you only have a day or two to fish, utilizing a guide can take all the guesswork out your time on the ice.

To book with Chris Weber, you can give him a call at (920) 728-2818, email cweb823@gmail.com, or talk with anyone over at Tackle Tom’s. Follow him on Instagram @lake_cascade_guidedfishing.
Gear Rental Details

As I mentioned before, if you’re going the DIY route, you can rent everything from Lake Cascade Ice Fishing Rentals. Since we drove up with most of Ana’s gear from Boise, we just rented a snowmobile and they delivered it right to our cabin situated near the lake.
A quick call to Lake Cascade Ice Fishing Rentals at (920) 728-2817 confirms they rent:
- Portable houses
- Augers
- Flashers
- Rods
- Snowmobiles
I flew with my own rods and flasher – however, the Livescope stayed home. These rental options make flying a solid option if you can meet up with a few fellow anglers and share some expenses.
I wouldn’t say anything is particularly fancy, but it gets the job done at a decent price. No Livescope was needed, my LX-7 did more than the trick and so will any one flashers. However, let me emphasize, you CAN fly with a flasher! Just keep in mind the regulations on flying with batteries and how they might apply to your specific unit.

DIY Gear List:
Traveled With:
- Rods (firmer panfish rods) – Try this Perch Seeker from St. Croix (Checked my rod box)
- Flasher (Marcum Lithium Shuttle/LX7 Flasher) – Flew in checked bag wrapped in my ice suit for padding
- Ice Suit, Clothes, Boots, Lures, Misc Tools (pliers, etc) – Flew all in large checked bag
- Accessories (toiletries, small electronics, etc) – Carry On
Gear Rentals/Purchases:
- Rods (if you don’t fly with them)
- Snowmobile, auger, portable, electronics (if need be) – Lake Cascade Ice Fishing Rentals
- Bait/license/any other forgotten lures or tools – Tackle Tom’s
- I also recommend picking up groceries in Boise before driving to Cascade
Cascade DIY Fishing Logistics
Tackle/Setup


I was told by multiple people to bring out the walleye rods, but honestly I felt like that was overkill. The Perch Seeker from St. Croix’s Custom Ice line is the perfect rod for this type of fishing. It has a firmer backbone and a sensitive, faster action end which is absolutely ideal when feeling bites and working small baits yet it still has enough power to handle bigger baits (like spoons and small lipless cranks). It’s also stout enough to handle aggressive fish like the occasional trout you might encounter on Cascade when targeting jumbos, especially if you’re in shallower water. It’s really a heavier duty panfish rod and honestly all the rod you need. However, a St. Croix Panfish Ice Combo will do the job just fine as well for a more budget friendly option. Ultimately what I’m saying here is that I have found my stiffer walleye rods to be overkill.
For line, you could get away with a lot of different things. I had monofilament, but braid with a fluorocarbon leader would have worked just as well (perhaps better, as there would be less twists and slack). As for line weight, 6 lb was completely fine for us.
As for baits, I caught them on 2 different types:
- Small lipless crank baits
- Rattling spoons (I love my Lindy Rattl’n Flyer spoon – use NICOLE15 to save)
Get the 1/16th size for the spoons. It doesn’t matter the brands, but if you decide to grab some flyer spoons you can use nicole15 at checkout for a discount on the entire site. Sometimes we tipped them with spikes and sometimes we didn’t.
I’ve seen in other posts/shows people using glide baits as well. My basic advice is to use more aggressive baits (and fish them aggressively)!

Map Accesses/Locations
There are plenty of public boat accesses mapped out, but if you are able to stay on the lake then you are set.
You can stay at Alpine Resort and RV, and work with Cascade Ice Fishing Rentals for machines. As mentioned, we had a trail right from our cabin to the lake and although we had to battle some slush and be careful of some creeks, it ended up being very convenient. However, if this isn’t the case for you then rest assured there is plenty of public accesses on the lake and the lake wasn’t nearly as big as I had thought. Covering ground is easy enough on a snowmobile from anywhere that you launch.

To give us some idea where to start we used Navionics – but people were catching fish all over. My best advice is to find some structure as a starting point and when you find some fish sit. It’s pretty standard. Then once you find the fish – wait it out for a bit. In some ways it reminded me of Red Lake, once you mark or get that first bite – they seem to cycle in for a bit. When you find some, there will probably be more.
Navionics was a great resource for us. It gives you some idea of structure, access, and places to start. Then it’s up to you to cover ground. Some people do walk out, but if you can afford to rent a sled then you are set.

Final Questions
A DIY trip I was worried would be complicated was a breeze. There is a budget needed to fly out and rent gear, but the DIY logistics were MUCH easier than I originally planned. The key is to just make sure you plan and book everything early.
As a member of VA, feel free to email at contact@virtualangling.com and I’ll answer any Cascade questions I can (or submit a question in our Q&A form here please!) I know it’s nice hearing from people who have successfully done it when planning, and it’s just one more resource I want to offer my fans, but particularly those interested in investing in this platform. Shoot me any question and mention Cascade in the subject and I’ll get back to you soon.
List of Resources:
- Boise Airport Vehicle Rental
- Lake Cascade Ice Fishing Rentals | (920) 728-2817
- Alpine Resort and RV (Highly recommend staying here)
- Tackle Tom’s | (208) 382-4367
- Airbnb (cabin/home rental)
- VRBO (cabin/home rental)
- Idaho Fish & Game (License and Regulations)


